

Candles are relaxing and can completely change the feel of your space. When you bring a new candle into your home, it can be exciting to light it up right away. But how long should you burn a candle for the first time? There are a few important factors to consider to ensure you get the most out of your candle and keep it burning safely.
Many people are unaware of the steps they need to take the very first time they burn a brand-new candle. We’ll walk you through everything you need to know about burning a fresh candle. Whether you’re enjoying your zodiac candles for the first time or want to know how to burn any candle all the way down, following these guidelines will help ensure that you can do so safely.
Start with Trimming the Wick
Did you know you’re supposed to trim the wick of your candle before lighting it? Always cut the wick to a quarter inch before lighting a candle, and take out any contaminants still in the top of the wax. This helps the flame burn more efficiently and reduces the risk of the candle smoking or creating a large, uncontrolled flame. Any debris left on the top will likely catch on fire, causing the candle to flare up. This can be dangerous and can even spread fire to surrounding objects.

Long or crooked wicks can also result in undesired consequences like uneven burning, dripping and sooting. Your candle will last longer if the wicks are properly trimmed, and who doesn’t want to get as much use out of their candles as possible? If you cut the wick every couple of hours, your candles can burn up to 25% longer. It’s best to use a candle wick trimmer to cut down the wick. These make life so much easier, and you don’t risk damaging your candle. Improperly cutting your candle’s wick can lead to the wax melting unevenly or even rendering your candle unusable. Make sure enough of the wick is visible that it isn’t immediately snuffed out by the melted wax.
Choose the Right Location for Your Candle
Make sure you choose an appropriate location for your new candle. Placing your candle in a place that is out of the way yet safe is extremely important. The best rooms to enjoy larger candles in are spacious, open spaces where the scent can spread freely. It’s not recommended to burn candles in very small, closed areas such as closets or closed powder rooms. Locations that have a lot of traffic may not be ideal, either, as the motion of people constantly walking by may cause your candle to go out.
Keep the candle away from any moving air, too, like from an open window or air vent. Moving air can cause the candle to burn unevenly or leave black marks on the inside of the glass. Always keep candles at least twelve inches from any loose or flammable materials like curtains or hanging decorations. Pick up anything that could potentially be a fire hazard from the area where you want to place your candle. Make sure it’s on a level surface to prevent any tipping or uneven burning.

If you’re burning a candle that requires a holder, like a taper candle, make sure it’s sized properly. You risk the candle falling over if the holder isn’t the correct size. If you’re burning a smaller candle, place it on a heat-resistant surface so you don’t damage your furniture. If you have multiple candles to light, place them at least three inches apart. This will prevent them from melting the neighboring candles, causing an uneven burn. If you have pets or children, keep burning candles out of their reach. They may not understand the dangers of an open flame and could cause a house fire inadvertently. In addition to this, you should never leave a candle unattended.
Burning a Candle for the First Time
It may not seem like it, but the first time you burn your candle is actually the most important. When you burn a fresh candle for the first time, you’re setting yourself up for success (or failure) for the rest of the candle’s life. The first time you burn a candle, it’s important to allow the wax to melt all the way to the edges of the jar or container. This is known as a “candle memory,” and it helps prevent the candle from tunneling or creating a small, deep well in the center as it burns.
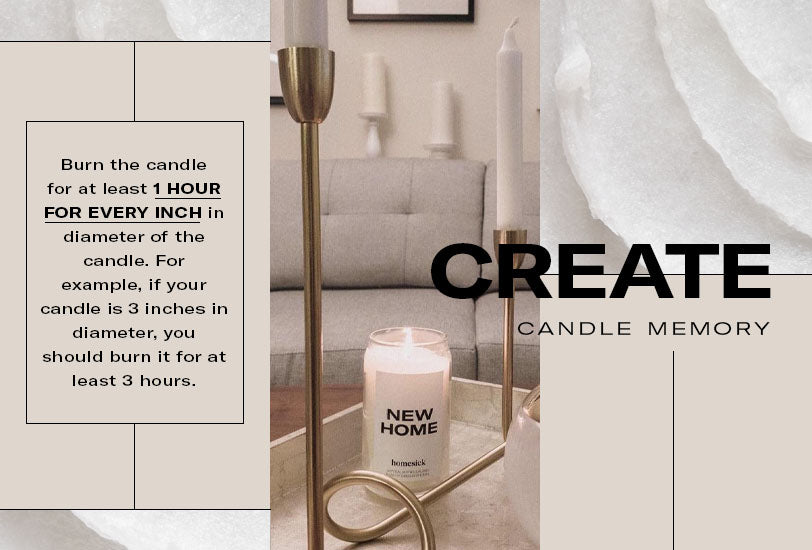
To create a candle memory, burn the candle for at least one hour for every inch in diameter of the candle. For example, if your candle is three inches in diameter, you should burn it for at least three hours. Once you’ve created a candle memory and established a healthy wick, you can continue to burn the candle for as long as you like, but it’s generally recommended to burn it for no more than four hours at a time. This helps prevent overheating and prolongs the life of the candle. When you burn a candle for too long, carbon begins to collect on the wick. This often leads to the candle smoking or having a larger, less controlled flame.
Extinguishing Your Candle
When putting out your candle for the first time and after each subsequent use, there are a few things to keep in mind. Using a candle snuffer is the best way to make sure your candle is put out safely. Snuffers prevent hot wax from being splashed around and are super easy to use. Never pour water on your candle to put out the flame. The drastic temperature difference between hot wax and cold water can cause your candle jar to break, making a huge mess and ruining your candle. Make sure the wick has no red embers left on it that could reignite the flame.
Once your candle is extinguished, avoid moving it around while the wax is still melted. Jostling the liquid wax can cause uneven melting the next time you light it. And, of course, it can cause spills. If there is any stray wax on the exterior of the glass, don’t remove it using anything sharp that might scratch it. This could weaken the container and cause it to break the next time it’s exposed to high heat. Wax is typically very easy to remove from glass and can be scraped off with even a fingernail. You’ll want to maintain the integrity of the glass to keep your candle burning for a long time.

Getting the Most from Your Candle
You may be wondering how to burn your candle all the way down in order to get the most use out of your candle. It’s not recommended to burn your candle past the last half an inch; however, you can remove the wax from the jar and repurpose it. If you don’t know how to get wax out of a candle jar, you aren’t alone. Fortunately, it’s pretty easy once you know the proper technique.
There are multiple ways you can remove wax from the glass jar it came in. The first method is to freeze the wax. When wax freezes, it shrinks. This makes it easy to wiggle free from the glass jar it came in. This method works best for candles that only contain a little bit of wax. The second method you can try when removing wax from a glass jar is adding boiling water to the jar. The heat from the boiling water will melt the wax and send it floating to the top of the glass. Once the water has cooled, the wax will harden again, making it easy to pour out of the glass with the water.
If you have a soy candle with a lower melting point, it may be easier to place the glass container inside boiling water. Be careful not to let any water get inside the glass with the wax. Once the wax is melted, pour it out and wipe the glass clean while the wax is still liquid.
The last way you can use to get wax out of old candle jars is best if you’re emptying multiple jars at a time. Preheat your oven to 200°F and prepare a baking sheet with foil or parchment paper. Next, place your candle jars upside down on the baking sheet. Make sure you don’t place too many on the sheet since you don’t want the sheet to overflow with wax. It should only take about 15 minutes to melt the wax from your containers. Make sure to use extreme caution when removing the jars from the oven.

Once you have the majority of the wax removed, no matter what method you’re using, you should clean out your jar. If you’re using a method that melts the wax, wipe out the jar while the wax is still hot. To remove any remaining residue, wash out your jar with dish soap and water.
If you’ll be removing a label from your jar, start by submerging the jar completely in a mixture of hot water and dish soap. If the labels are particularly tricky, you may also want to add white vinegar. Let your jar soak for about ten minutes, and then check the label. You may need to repeat this a few times. Once the label is fully saturated, it should come off in one piece. If any residue is left on the jars after peeling the labels off, you can rub it with baking soda until the gunk is gone. There are also products made to remove sticky residue from surfaces. If you choose to go this route, just be sure to read and follow the instructions on the packaging.
Storing Your Candles
Make sure you store your candles properly to prolong their life. Never store them in a location that’s warm enough for them to melt, including in direct sunlight. Cool, dark locations, like cabinets or closets, are best. If your candle has a lid, replace it prior to storing. This will help prevent dust and other debris from getting into the wax and around the wick. This will also help protect the wax and fragrance. Store your candles safely in a location where they aren’t likely to be broken.
Best Homesick Candles to Try
If you’re new to Homesick, you may be wondering where to start. The good news is we have a candle for everyone! Whether you’re looking for a candle that reminds you of your favorite activity or you want a candle that represents your favorite fandom, we’ve got you covered.

If you’re the outdoorsy type, our Gone Hiking or Ski Trip candles are the perfect scents for you. Gone hiking primarily consists of pine, jasmine and sandalwood to create the woodsy smell of a hike through the forest. Ski Trip smells like frosted air, cinnamon and cedar to remind you of the chilly winter slopes.
If you’re more of a homebody, try out our Book Club candle. It’s perfect for a rainy day read with notes of nutmeg, amber and sandalwood. You can even try out our Star Wars™ or Harry Potter™ themed collections, which are perfect for anyone celebrating their fandom.
Conclusion
Candle care is more important than many people realize. In order to get the most life out of your candle, it’s best to follow these guidelines from the very first time you use it. Burning, storing and caring for your candle in the proper manner will keep your candle burning correctly and for longer. Once your candle has been completely used up, repurposing the jar is a great way to get the most bang for your buck and keep the glass out of the landfill. Use these tips to take care of your Homesick candles. Happy burning!
Image Credits
Kat Ka/Shutterstock.com
Enjoy The Life/Shutterstock.com
PV productions/Shutterstock.com


