
Candle tunneling is one of the most common reasons why people fail to get the most out of their candles. It occurs when only the center of the wax right around the wick melts and burns down, leaving a band of hard wax around the outside of the candle. This can happen with any candle; however, it is most common among cheaper ones. Usually, it happens due to either having a wick that’s too small for your candle or from not leaving it lit long enough during the first use. If you don’t give your first burn plenty of time and space, then you’re likely headed toward disaster.
To make sure you get good long-burning candles you should ensure that your wick size matches your candle’s size, light it for three or four hours during the initial use and keep an eye on how much is melting away. If you love candles but find yourself constantly disappointed by tunneling, this guide is for you. We’ll show you how to fix candle tunneling once and for all so that you can enjoy beautiful, evenly burned candles every time. Plus, learning how to burn a candle all the way down enables you to get the most out of your purchase. Read on to learn more!
What Is Candle Tunneling?
Candle tunneling is an issue that plagues many candle enthusiasts. It occurs when the candle begins to burn down in a tunnel-like shape, often resulting in an uneven burn and wasted wax down the sides of the jar. This can be especially annoying if you’ve invested in a beautiful, decorative candle. There is no reason to fret, though. There are steps you can take to prevent candle tunneling. With just a bit of effort, your candles will be looking and burning as good as new.
What Causes Candle Tunneling?
This problem can be caused by anything from a large, cool draft to the size of your flame. Even the type of wax you choose for your candles can contribute to it. For example, candles made from soy wax are much less susceptible to tunneling than those made from lower-quality materials like paraffin wax. Similarly, cheap candles often have additives that don’t evaporate easily when they are lit. This results in a slower burn time and more wax buildup on the edge of the container. While lower-quality candles are less costly upfront, getting the most use possible out of them is often very difficult due to tunneling issues. Buying higher-quality candles and using them properly is the most cost-effective and least wasteful option in the long run.

How to Avoid Candle Tunneling
If you’ve ever bought a candle, burnt it a couple of times and found that it tunneled right down, leaving an unsightly ring of unmelted wax, don’t worry. You are not alone. This is a common problem candle lovers face every day. Fortunately, there are several easy ways you can prevent this from happening each time you light your candle. To avoid this unfortunately common issue, make sure you burn candles in warm and draft-free environments and trim your wicks to no longer than 1/4" with a candle wick trimmer before lighting them. Smaller flames burn more evenly and are less likely to cause tunneling.
About Candle Memory
The first burn is crucial and sets the stage for how the candle will melt. Because wax has memory, the first burn often determines the radius of the melt. In other words, if you only leave the candle lit long enough to form a small tunnel the first time you use it, it may never create a pool that extends all the way to the edge of the container. Even if you only create a small tunnel, the wax in the tunnel will melt first the next time you use the candle because it is softer than the surrounding wax. This will make the tunnel deeper and result in more wax being left around the edge. Candle science is pretty amazing, and the better you understand it, the more evenly you’ll be able to burn your candles.

Burning Your Candle for the First Time
The first time you use a candle, make sure it is in a draft-free area where you can check on it every 30 minutes or so. Leave it lit until at least the top layer of wax has melted completely. The deeper this layer is, the better. The exact amount of time it will take for a candle to melt all the way to the edge of the container varies depending on the wax type, candle size and wick length. However, it normally takes roughly an hour of burn time for each inch of the candle’s diameter. Make sure you have enough time to let the first layer melt entirely before using a candle for the first time.
During each subsequent use, strive to always let the wax melt all the way to the edge before extinguishing the candle. For the best results, we recommend burning our candles for no less than two hours and no more than four hours at a time. When you follow these rules closely, you should be left with a smooth top layer after each use.
How to Burn a Candle Evenly
Even after the first use, burning a candle evenly can be somewhat of a challenge. To make sure you get the most out of your candle and make it last longer, follow these simple steps. First, ensure that the surface you are burning the candle on is completely level. This will ensure all parts of the wick have enough heat to melt the wax evenly. After you’re done with your flame for the day, allow the candle to cool completely before relighting. Last, make sure to cover your candle when it’s not in use. This prevents dust and air from entering the container.

How to Fix a Candle That Has Already Tunneled
If your candle has already tunneled, don’t panic! It’s easy to fix this problem. Before you light the candle again, trim down the wick and remove any built-up carbon around it. This will help you get a longer, more even burn in future uses. Then, relight the candle and let it burn until a full melt pool of melted wax forms. This will allow your candle to use up all its available wax so every time you light it after that, you should get a level flame and no more tunneling. Remember to always trim the wick before relighting your candles to ensure a consistent burn each time. If this doesn’t work, there are a few other options you can try.
Heat the Candle with a Blow Dryer
If the tunneling is mild, try using a blow dryer to melt the top layer of wax. It will become smoother and more level as it cools, allowing you to start over without the tunneling.
Melt the Wax in Your Oven
If the tunneling is too deep for a hair dryer, try the oven. Preheat your oven to 175 degrees Fahrenheit. Then place the candle on a sturdy cookie sheet and put it in the oven for about five minutes. Keep a close eye on it as the wax begins to melt. Depending on the size of your candle and the depth of the tunnel, you may need to leave it in the oven for more or less time. Once the top layer of wax has completely melted, carefully remove your candle from the oven. Be sure to use oven mitts, as the glass container will be hot.

Try the Foil Tent Method
Another option is the foil tent method. Light the candle, and then carefully place a tent of aluminum foil over the top. Poke a small hole in the top to allow the smoke to escape. As the candle burns, the foil will reflect heat back onto the wax, melting it around the edges instead of just in the center. Keep a close eye on the candle, and carefully remove the foil once the entire top layer of wax has melted evenly. The foil will be extremely hot, so don’t grab it with your bare fingers! Use an oven mitt or tongs. Finally, blow out the candle and let the wax cool. Afterward, the top should be level and ready for the next burn. If necessary, trim the wick before using the candle again.
Remove the Excess Wax
If you want to even the wax out quickly, try scraping away the excess using the back of a spoon or a butter knife. Carefully scrape off the unmelted part and set it aside. Learn more about how to get wax out of a candle jar here. When you are finished, the candle should burn evenly. Don’t throw away the excess wax! You can use it in a wax melter or melt and pour it into a new container, add a wick and turn the extra wax into a new candle.
Replace the Wick
When all else fails, you may need to replace the wick. To do this, you’ll need to remove the wax and the old wick. Melt the wax in the oven or a double boiler, and then center a new wick in the center of the candle container. Carefully pour the melted wax in, ensuring that the wick remains in the middle. Let cool for at least 24 hours, and then burn for one to two hours after the wax has solidified. Be sure to let it burn long enough that the wax melts all the way to the edge of the container.
Tips for Getting the Most Out of Your Candles
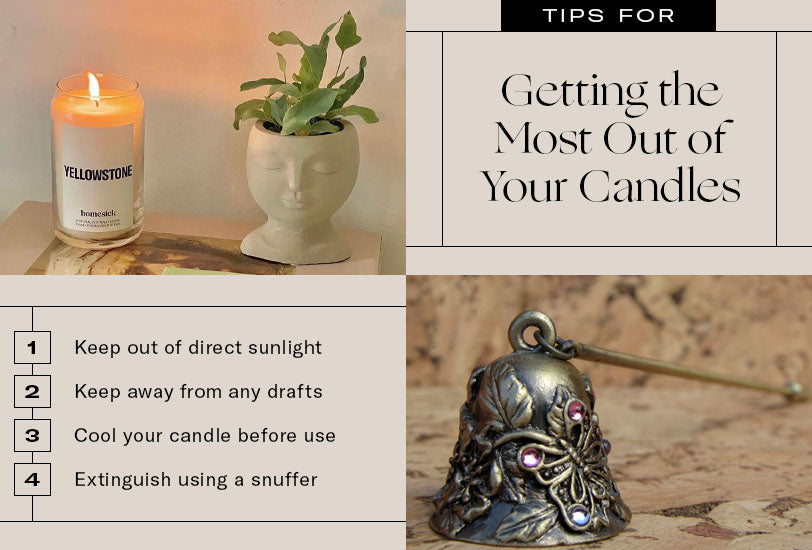
If you want to get the most out of your candles and make them last longer, some basic candle care is all it takes. Make sure to keep your candles out of direct sunlight and away from any drafts, as they can cause the wax to melt unevenly. Trim the wick down before lighting it, as it will help preserve your candle’s scent when burning and help minimize soot production. Also, try burning your candle in two- to four-hour increments and allowing the pool of wax to reach its outer edges every time for an even burn. Here are a couple of additional tips:
Cool Your Candle Before Use
Believe it or not, cooling your candles before burning them can make them last longer. By doing so, you are slowing down the burning process, enabling your candle to burn more slowly and stay lit for a longer duration. To cool your candle, just cover it with foil or cling wrap (to prevent the wick from absorbing moisture) and pop it in the fridge for an hour. That’s all it takes to experience your candle burning at its maximum potential.
Extinguish Using a Candle Snuffer
When it comes time to extinguish a candle, the traditional method may be to blow it out, but that’s not always the best idea. Not only can blowing out a candle spread smoke and floating wax particles around your room, but it can also decrease the quality of future burn sessions.
Snuffing a candle is much safer and more effective. Candle snuffers are specifically designed to trap smoke and other particles. This means you’ll enjoy the lingering smell of your candle rather than feeling like you’re suffocating from all of the smoke that’s produced when you blow a candle out. Candle snuffers are super simple to use; all you have to do is cover the flame with the cup. This will prevent oxygen from reaching the flame, and the candle will go out in a few seconds. So, next time you want to put out a lit candle, make sure to use a candle snuffer instead!

Conclusion
Now that you know all about candle tunneling, you can enjoy your favorite candles with confidence. Be sure to look for an efficient wick. If you do see your candle start to tunnel, trim the wick or try some of the other suggestions above, so the candle will burn evenly again. If you’re looking for a unique new fragrance for your home, check out our Zodiac candles. No matter what scent you choose, we hope you enjoy your beautifully scented Homesick candle and it brings back memories of your happy place!
Image Credits
Aleksse/Shutterstock.com
Sarin/Shutterstock.com
Pam Walker/Shutterstock.com
valkoinen/Shutterstock.com


